In this tutorial, you'll learn how to use custom fonts in your SwiftUI app. You'll start by adding the custom font file to your Xcode project, and then you'll learn how to load and use the font in your SwiftUI views. You'll also learn how to set a custom font for the entire app using the .environment modifier.
By the end of this tutorial, you'll be able to use any custom font in your SwiftUI app and take your app's design to the next level.
How to set a custom font in iOS using info.plist and the font modifier

Aside from providing system fonts, SwiftUI also gives you the option of adding custom fonts. In this tutorial, you'll learn how to add a custom font from Google or Apple Fonts and use in your project.
Google Fonts
Google provides free fonts to use in your app and sites. Head to fonts.google.com to grab font files if you don't have.
Drop the Font folder to Xcode
Drag and drop the downloaded fonts folder to your Xcode Project, next to Assets.xcassets. Make sure to check Copy items if needed, create groups and add to targets. Note: SwiftUI supports file formats .otf and .ttf.

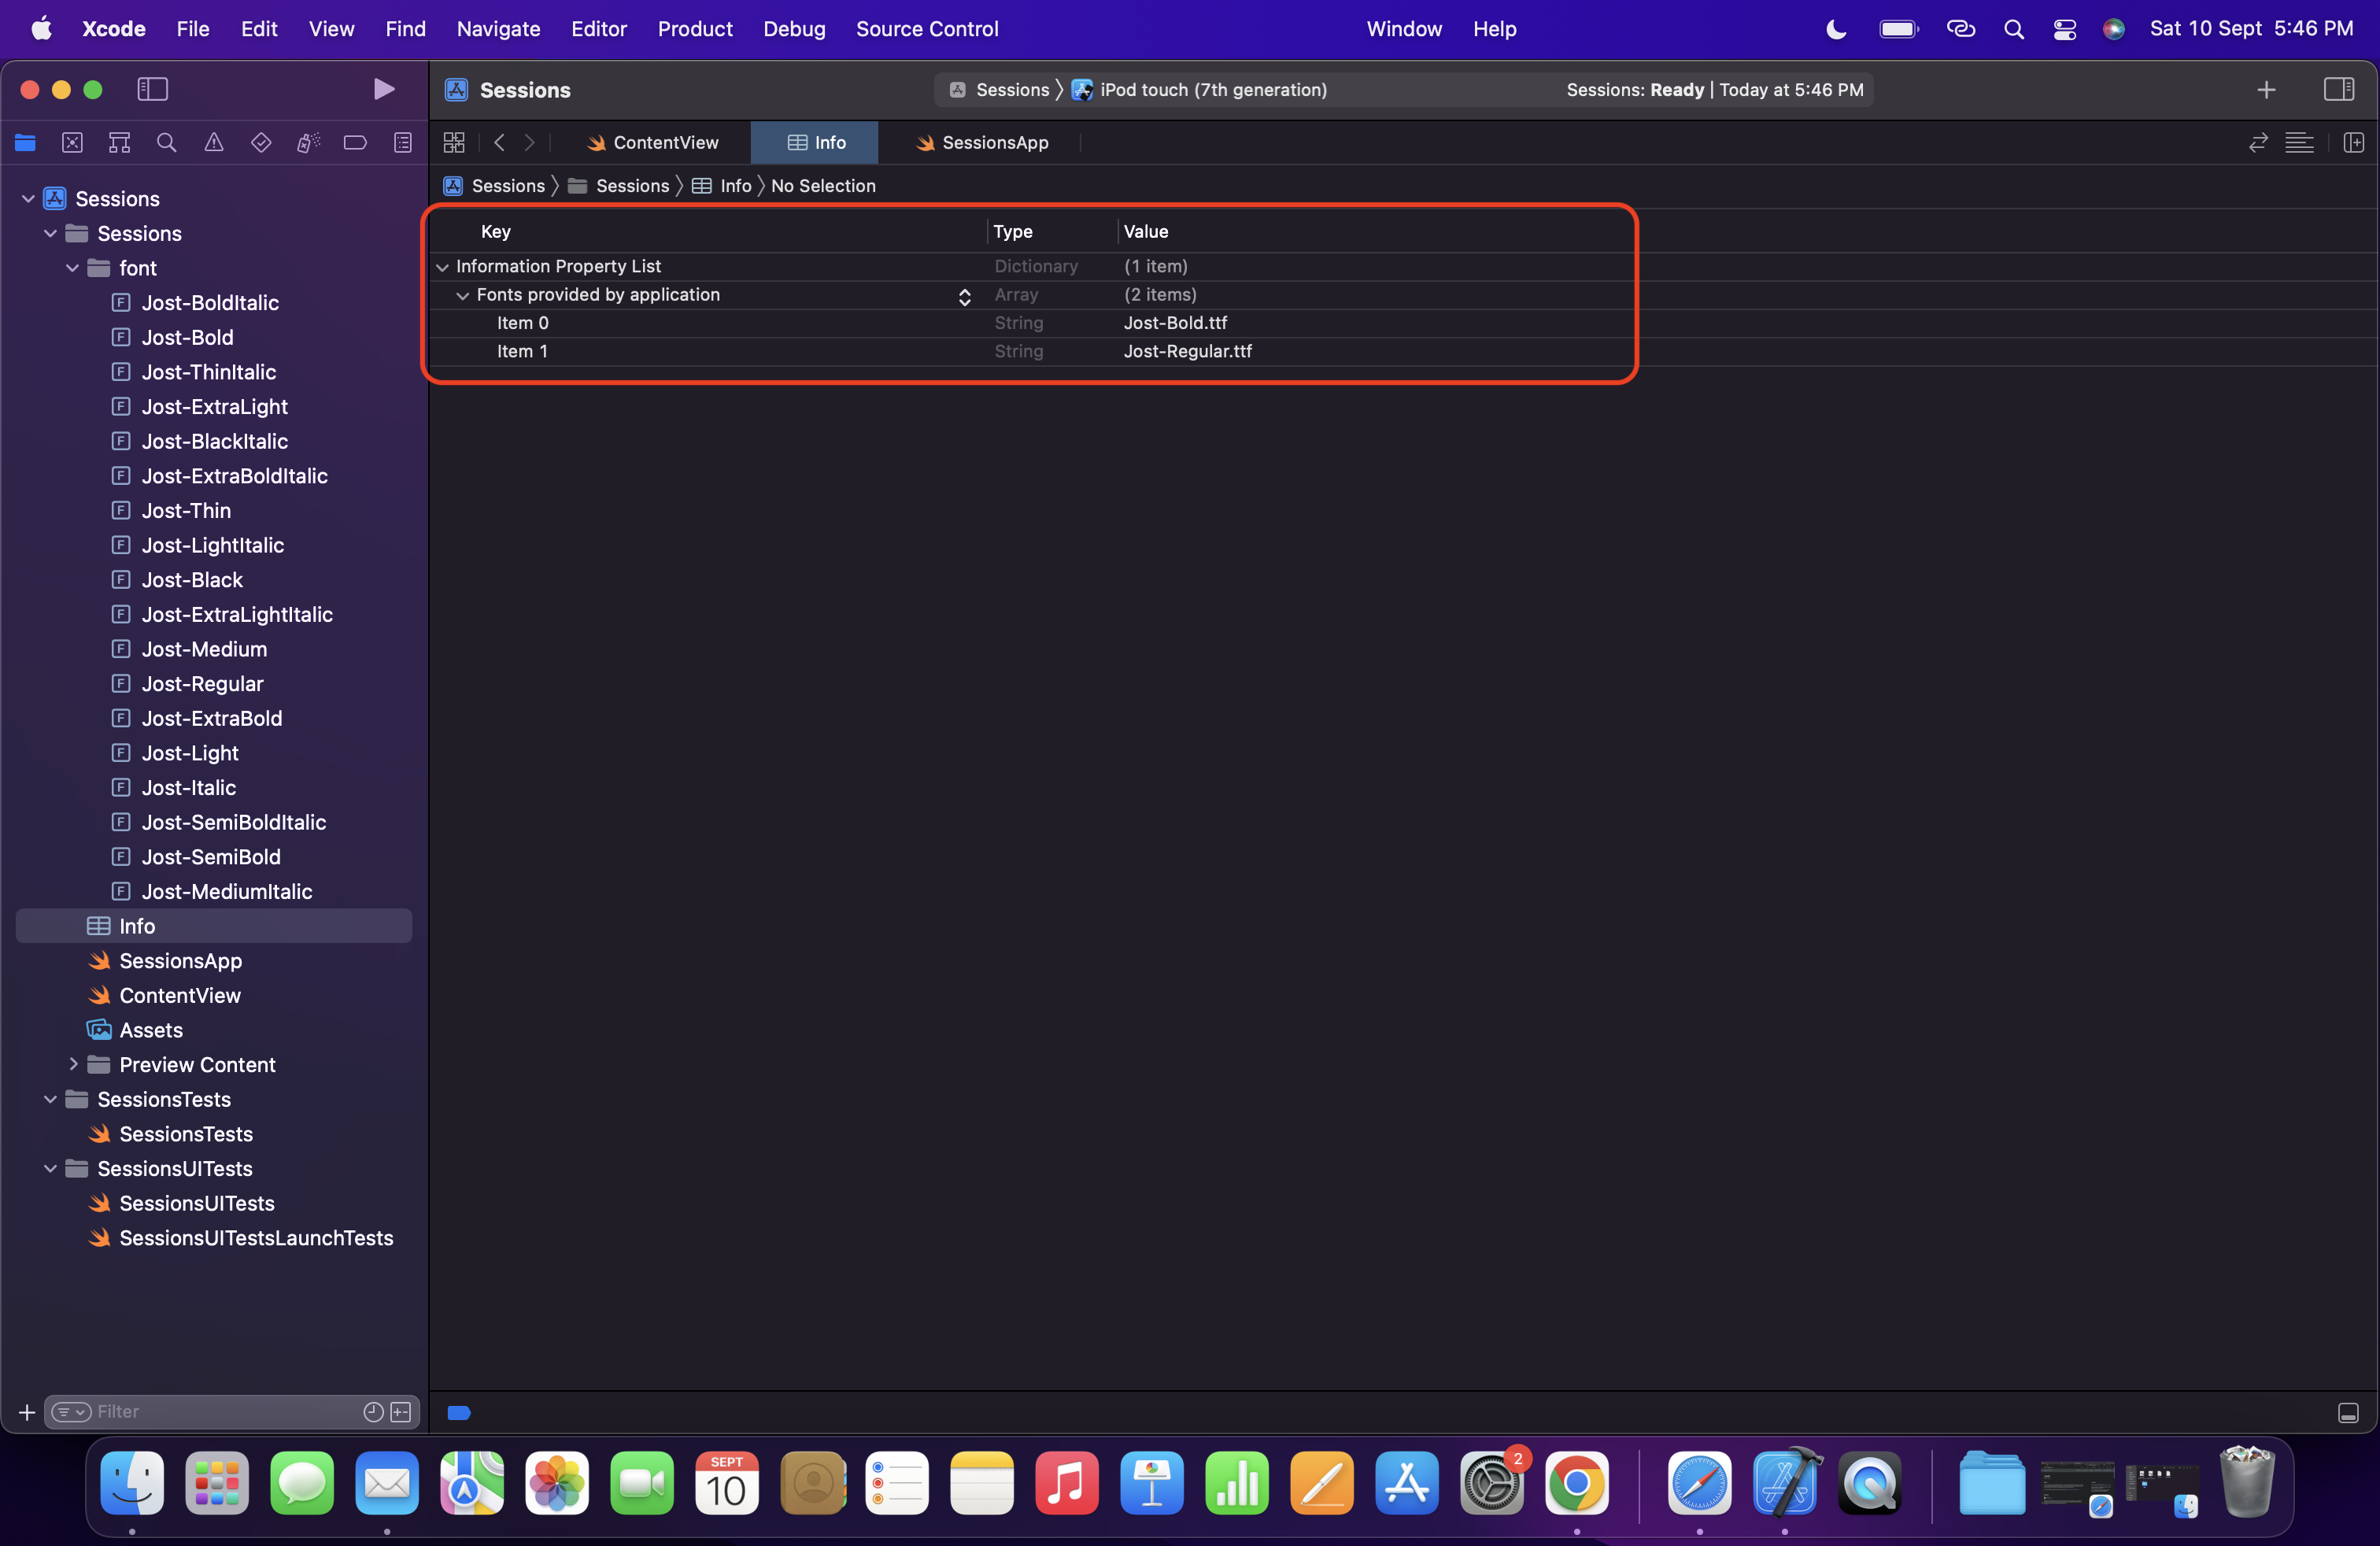
Info.plist
- Navigate to the Info.plist file and click the + icon next to Information property list. **In the new field, search for **Fonts provided by application and hit enter. This will create a collapsable menu with many items, starting with item 0.
- In the value field, set OpenSans-Regular.ttf
- To add more font variations, click the + next to item 0
- The second font file will be OpenSans-Bold.ttf
- You can keep adding more by clicking on the + icon and repeating the steps
..
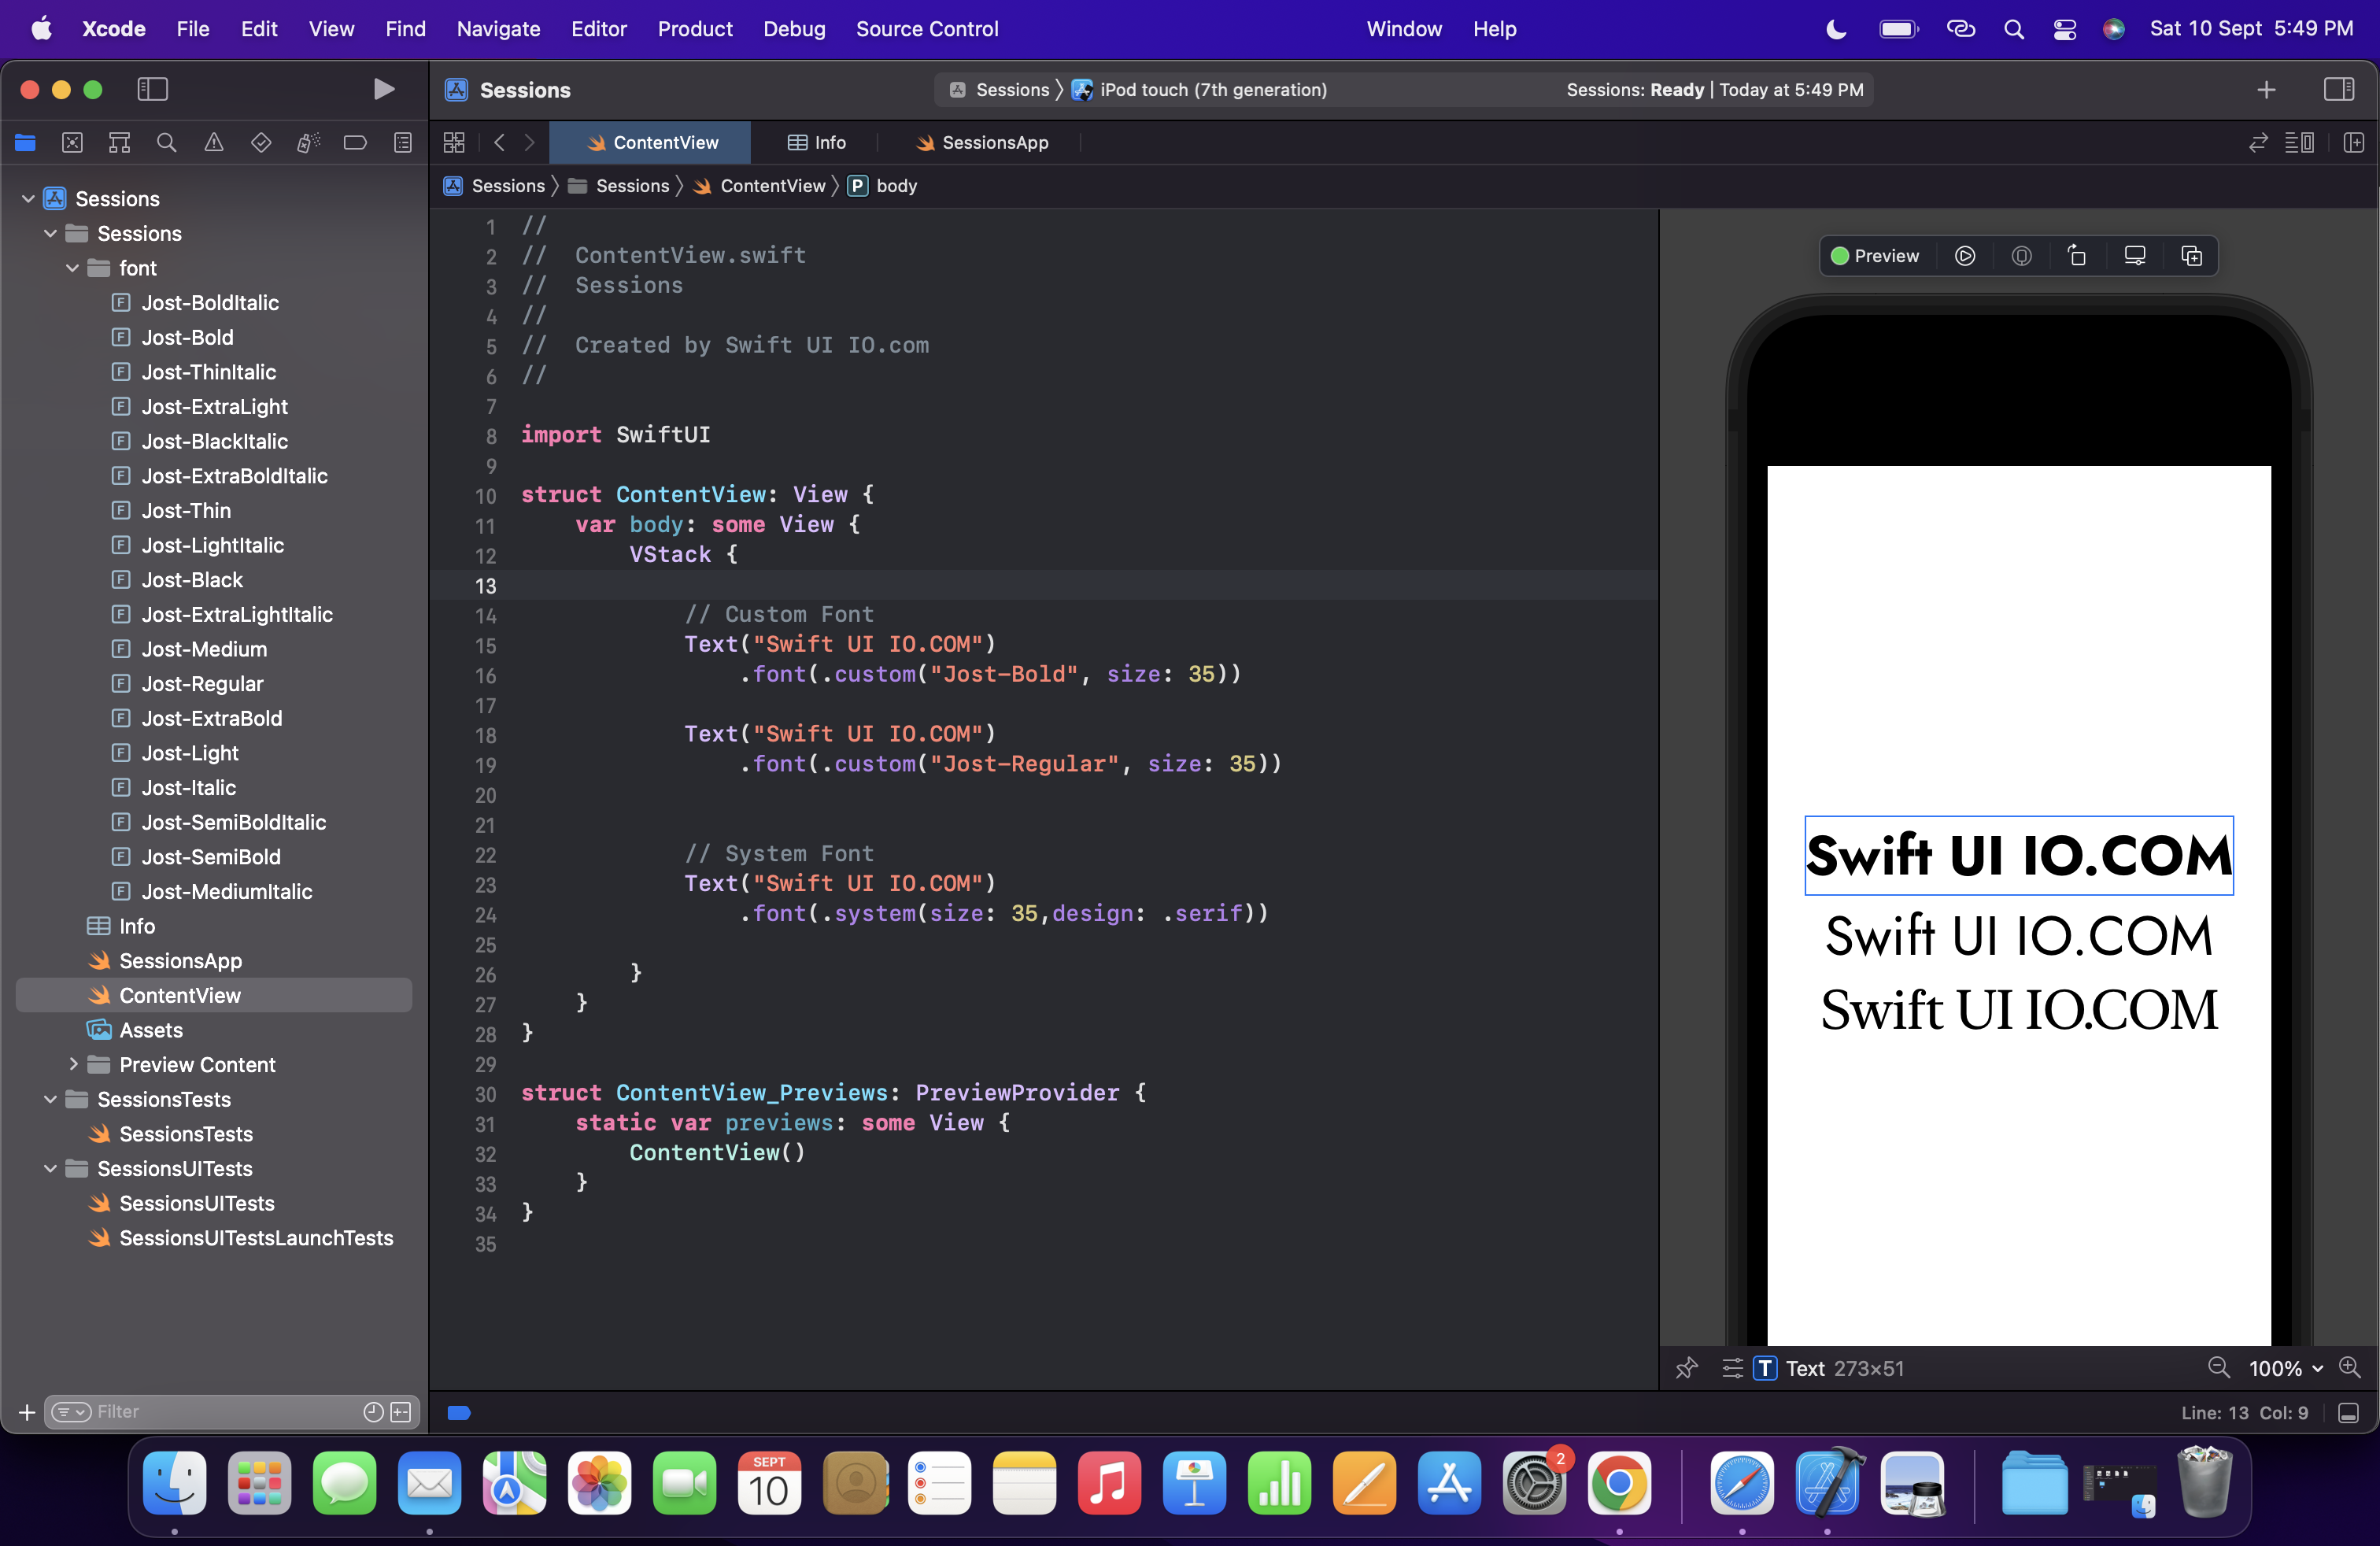
Using Custom Fonts
To use your custom font, use the font modifier with .custom. The name should be the same as the font file, without the extension.
.font(.custom("Jost", size: 34))..
Output: