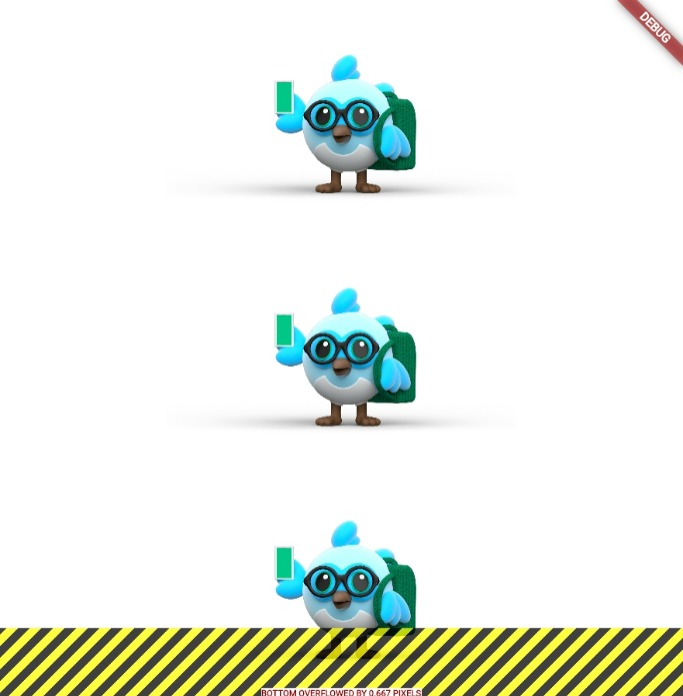
Learn how to size widgets in Flutter to ensure they fit within the device's screen using the Expanded widget.
When a layout is too large to fit a device, a yellow and black striped pattern appears along the affected edge. This can be easily fixed in Flutter by using the Expanded widget, which allows widgets to be sized to fit within a row or column.
In this example, we have a row of images that is too wide for its render box, and we can use the Expanded widget to fix it.
Usage:
To use the Expanded widget, wrap the widget that needs to be resized with it.
In the example below, each image widget is wrapped with an Expanded widget to ensure it fits within the row:
Code:
Column(
        children: [
          Image.asset(Images.logoBird,  width: 300, height: 200,),
          Image.asset(Images.logoBird,  width: 300, height: 200,),
          Image.asset(Images.logoBird,  width: 300, height: 200,),
        ],
      );
..
Solution: (A RenderFlex overflowed)
Column(
        children: [
          Expanded(
            child:   Image.asset(Images.logoBird,  width: 500 , height: 200,),
          ),
          Expanded(
            child:   Image.asset(Images.logoBird,  width: 500 , height: 200,),
          ),
          Expanded(
            child:   Image.asset(Images.logoBird,  width: 500 , height: 200,),
          ),
        ],
      );
Properties:
- crossAxisAlignment: Aligns children vertically
- children: Widgets to be placed in the row
- Expanded: Widget that allows its child to fill the available space
..
Handling Flutter Images like a Pro
// Create a class to hold all the image assets in your app
class Images {
  Images._(); // private constructor
  static const String logoBird = 'assets/images/logoBird.png'; // Image asset name and location
}
..
Tags:
flutter


